Autoscaling with AWS, Laravel, CodeDeploy and OpsWorks Chef Automation.

1_vaHJxGX7B0dR38v6RIcRjw

For one of our clients there was the need to use AWS Autoscaling to make sure there was always enough capacity and reducing the effect of hardware failure on the side of AWS.
Or as AWS calls it:  “EC2 has detected degradation of the underlying hardware hosting your Amazon EC2 instance.”

Anyhow let’s get started setting thing up:
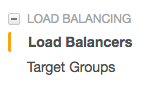
1. Create a ELB

You can find Load balancers under EC2 in AWS console

Make sure you create a classic load balancer, this is needed for blue green deployments or if you want multiple sites through with SSL on the same load balancer. If you want in place deployments then an application load balancer is also possible.

2. Creating a launch configuration

Under EC2 there is a submenu called launch configurations.

3. Create Auto Scaling group

Create a new auto scaling group, select launch configuration, subnet and create.

4. Create application Codedeploy

Pick blue green deployment, your auto scaling group and your load balancer you just created.

5. Enable CodeDeploy on Bitbucket

https://marketplace.atlassian.com/plugins/bitbucket-aws-codedeploy/cloud/overview

6. Add appspec.yml file to your laravel project

Reference: http://docs.aws.amazon.com/codedeploy/latest/userguide/reference-appspec-file-example.html 
My appspec.yml file.

7. Add scripts directory

Add a scripts directory in the root of your laravel project and add the following files:

after-install.sh
application-start.sh
application-stop.sh
before-install.sh
validate-service.sh

Contents of after-install.sh in my case:

#!/bin/bash

cd /var/www/project/
composer install
npm install
gulp --production

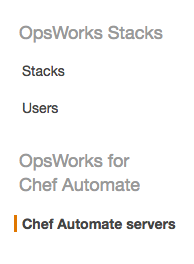
8. Create a Chef Automation server

Go to OpsWorks and click create chef automate server under chef automate servers.

Walk through the setup.
Download the starters kit, dashboard credentials and SDK while AWS is setting up the instance.

9. Create a web role.

What we want is that when a new server comes online it get’s assigned a role. With that role comes a default configuration we specify.
So an EC2 instance launches with OS and then registers itself with our chef automation server and gets a role assigned.

You can create a role in the starterskit that comes with the chef automation server.
Here’s our role:

				
					{
   "name": "web",
   "description": "Web server role.",
   "json_class": "Chef::Role",
   "default_attributes": {
     "chef_client": {
       "interval": 300,
       "splay": 60
     }
   },
  "override_attributes": {
    "nginx": {
      "gzip": "on"
    }
  },
   "chef_type": "role",
   "run_list": [
      "recipe[chef-client::default]",          
      "recipe[chef-client::delete_validation]",
      "recipe[apt]",
      "recipe[chef_nginx]",
      "recipe[php]",
      "recipe[composer]",
      "recipe[nodejs::npm]",
      "recipe[project]",
      "recipe[code_deploy::default]"
   ],
   "env_run_lists": {
   }
}


In the run list you can see the recipes we used to configure the role.
The recipe project is a cookbook we created specific for this project.

So let’s continue doing that.

10. Create a project-specific cookbook

Run knife cookbook create project in your terminal to get started.
Now open the default.rb recipe file.
This default recipe get’s run when using this cookbook.

Example of our file:

				
					#
# Cookbook:: project
# Recipe:: default
# Install a FPM pool named "default"
include_recipe 'php::default'
include_recipe 'chef_nginx'
include_recipe 'chef_nginx::http_realip_module'
include_recipe 'nodejs::npm'

package 'php-fpm'
package 'php7.0-mbstring'
package 'php7.0-intl'
package 'php7.0-curl'
package 'npm'
package 'ruby-dev'
package 'supervisor'

# Create directories
directory '/var/www' do
  owner 'root'
  group 'root'
  mode '0755'
  action :create
end

user 'project' do
  group 'www-data'
  home '/home/project'
  shell '/bin/bash'
end

group 'project' do
  action :create
  members 'project'
  append true
end

directory '/home/project' do
  owner 'project'
  group 'project'
  mode '0755'
  action :create
end

directory '/var/www/project' do
  owner 'project'
  group 'www-data'
  mode '0755'
  action :create
end

# .env files
cookbook_file "/var/www/project/.env" do
  source ".env"	
  owner "project"
  group "www-data"
  mode  "0644"
end

# Supervisor
cookbook_file "/etc/supervisor/conf.d/project-worker.conf" do
  source "project-worker.conf"
  owner "root"
  group "root"
  mode "0644"
end

bash 'enable-worker' do
  code <<-EOH
  sudo supervisor reread
  sudo supervisor update
  sudo supervisorctl start project-worker:*  
  EOH
end	

# deploy your sites configuration from the 'files/' directory in your cookbook
cookbook_file "#{node['nginx']['dir']}/sites-available/project" do
  owner "root"
  group "root"
  mode  "0644"
end

nginx_site 'project' do
	action :enable
end


This default recipe installs some php modules and sets up user, website and supervisor, change and expand how you see fit.

The cookbook_file functions pulls a file from your files directory in your cookbook.
More on cookbook_file here: https://docs.chef.io/resource_cookbook_file.html

11. Making sure a new instance get’s the web role assigned.

So on startup you can run a bash script, you can upload this script when you create your launch configuration.
So go back to your lauch configuration, copy to make a new version and upload the following bash script in the userdata field:


					#!/bin/bash

exec > >(tee /var/log/user-data.log|logger -t user-data -s 2>/dev/console) 2>&1

# Required settings
NODE_NAME="$(curl --silent --show-error --retry 3 http://169.254.169.254/latest/meta-data/instance-id)" # This uses the EC2 instance ID as the node name
REGION="eu-west-1" # Valid values are us-east-1, us-west-2, or eu-west-1
CHEF_SERVER_NAME="chef-server-name" # The name of your Chef server
CHEF_SERVER_ENDPOINT="your-endpoint-here" # Provide the FQDN or endpoint; it's the string after 'https://'

# Optional settings
CHEF_ORGANIZATION="default"    # Leave as "default"; do not change. AWS OpsWorks for Chef Automate always creates the organization "default"
NODE_ENVIRONMENT=""            # e.g. development, staging, onebox ...
CHEF_CLIENT_VERSION="" # latest if empty

# Recommended: upload the chef-client cookbook from the chef supermarket  https://supermarket.chef.io/cookbooks/chef-client
# Use this to apply sensible default settings for your chef-client configuration like logrotate, and running as a service.
# You can add more cookbooks in the run list, based on your needs
RUN_LIST="role[web]" # e.g. "recipe[chef-client],recipe[apache2]"

apt-get -y install python
apt-get -y install unzip

# ---------------------------
set -e -o pipefail

AWS_CLI_TMP_FOLDER=$(mktemp --directory "/tmp/awscli_XXXX")
CHEF_CA_PATH="/etc/chef/opsworks-cm-ca-2016-root.pem"

install_aws_cli() {
  # see: http://docs.aws.amazon.com/cli/latest/userguide/installing.html#install-bundle-other-os
  cd "$AWS_CLI_TMP_FOLDER"
  curl --retry 3 -L -o "awscli-bundle.zip" "https://s3.amazonaws.com/aws-cli/awscli-bundle.zip"
  unzip "awscli-bundle.zip"
  ./awscli-bundle/install -i "$PWD"
}

aws_cli() {
  "${AWS_CLI_TMP_FOLDER}/bin/aws" opsworks-cm --region "${REGION}" --output text "$@" --server-name "${CHEF_SERVER_NAME}"
}

associate_node() {
  client_key="/etc/chef/client.pem"
  mkdir /etc/chef
  ( umask 077; openssl genrsa -out "${client_key}" 2048 )

  aws_cli associate-node 
    --node-name "${NODE_NAME}" 
    --engine-attributes 
    "Name=CHEF_ORGANIZATION,Value=${CHEF_ORGANIZATION}" 
    "Name=CHEF_NODE_PUBLIC_KEY,Value='$(openssl rsa -in "${client_key}" -pubout)'"
}

write_chef_config() {
  (
    echo "chef_server_url   'https://${CHEF_SERVER_ENDPOINT}/organizations/${CHEF_ORGANIZATION}'"
    echo "node_name         '${NODE_NAME}'"
    echo "ssl_ca_file       '${CHEF_CA_PATH}'"
  ) >> /etc/chef/client.rb
}

install_chef_client() {
  # see: https://docs.chef.io/install_omnibus.html
  curl --silent --show-error --retry 3 --location https://omnitruck.chef.io/install.sh | bash -s -- -v "${CHEF_CLIENT_VERSION}"
}

install_trusted_certs() {
  curl --silent --show-error --retry 3 --location --output "${CHEF_CA_PATH}" 
    "https://opsworks-cm-${REGION}-prod-default-assets.s3.amazonaws.com/misc/opsworks-cm-ca-2016-root.pem"
}

wait_node_associated() {
  aws_cli wait node-associated --node-association-status-token "$1"
}

install_aws_cli
node_association_status_token="$(associate_node)"
install_chef_client
write_chef_config
install_trusted_certs
wait_node_associated "${node_association_status_token}"

if [ -z "${NODE_ENVIRONMENT}" ]; then
  chef-client -r "${RUN_LIST}"
else
  chef-client -r "${RUN_LIST}" -E "${NODE_ENVIRONMENT}"
fi


This script installs AWS cli and registeres this instance with your chef automation server, also you can see the web role in the run list. This ensures it get’s the right configuration from the chef automation server.

So let’s assign this new launch configuration to your auto scaling group and kill the current EC2 machine.
AWS will start a new instance with the new launch configuration and userdata we just specified.

If all went well you should see your node in the chef automation dashboard.
If not log in to the new instance and run sudo chef-client -r “role[‘web’]” and debug :).


12. Start a codedeploy

So under a branch in bitbucket press deploy to AWS.

You will get a popup to select a deployment group, select and press submit.
What will happen is that your project get’s zipped and stored in S3 and then a new deployment get’s started that deploys that revision to your servers.

So make sure the role you specified when configuring CodeDeploy for bitbucket has sufficient rights to place the code on S3.
Also make sure that the default role for the instance has enough rights to pull the project from s3.

In the AWS under Codedeploy you can see the progress of the deployment.

If all went well you can log into your instance and check your project, maybe run php artisan list to see if there are any errors.

13. Start codedeploy from bitbucket pipelines

Our bitbucket-pipelines.yml file:

				
					# This is a sample build configuration for PHP.
# Check our guides at https://confluence.atlassian.com/x/VYk8Lw for more examples.
# Only use spaces to indent your .yml configuration.
# -----
# You can specify a custom docker image from Docker Hub as your build environment.
image: pionect/pipelines:latest

pipelines:
  default:
    - step:
        script: # Modify the commands below to build your repository.
          - composer install --no-interaction
          - $BITBUCKET_CLONE_DIR/vendor/bin/phpunit
  branches:
    master:
      - step:
          script:
            - apt-get update && apt-get install -y python-dev
            - curl -O https://bootstrap.pypa.io/get-pip.py
            - python get-pip.py
            - pip install awscli
            - aws deploy push --application-name project --region eu-central-1 --s3-location s3://code-deploy/project
            - aws deploy create-deployment --file-exists-behavior DISALLOW --application-name project --region eu-central-1 --s3-location bucket=code-deploy,key=project,bundleType=zip --deployment-group-name project


The aws deploy push and aws deploy create-deployment ensures that when a commit to master passes the unittests it get’s deployed to production automatically.

That’s pretty much it. Happy coding!!

Related blogs

Want to get in touch and learn more about what we can do? We love to just have a chat digital or in person.